In this guide, we explain how to install and configure the Cloudflare SSL certificate on cPanel-based hosting like GoDaddy.
In case you are using VPS and not cPanel-powered web hosting, then you can check this guide for installing Cloudflare SSL on VPS with an Apache server.
This guide will work with any cPanel hosting where you want to use the Cloudflare SSL for your domain.
First of all, create an account on Cloudflare if you don’t have an account yet. Then, you will need to add your site domain. Let’s call it “example.com”.
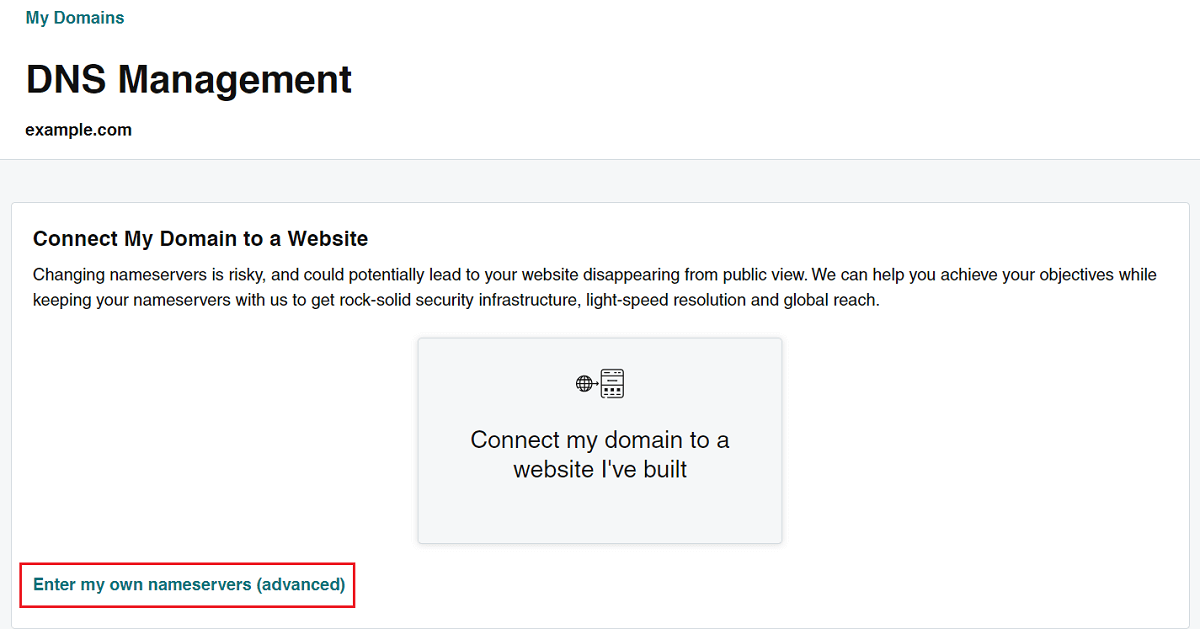
Changing the Nameservers
After adding the domain name, you will get the nameservers provided by Cloudflare. These nameservers will look something like this:
eric.ns.cloudflare.com
vera.ns.cloudflare.com
Now, we need to change or replace the nameservers of your domain hosting with these nameservers which you get from Cloudflare.
In GoDaddy, you will find the list of your domains like this:
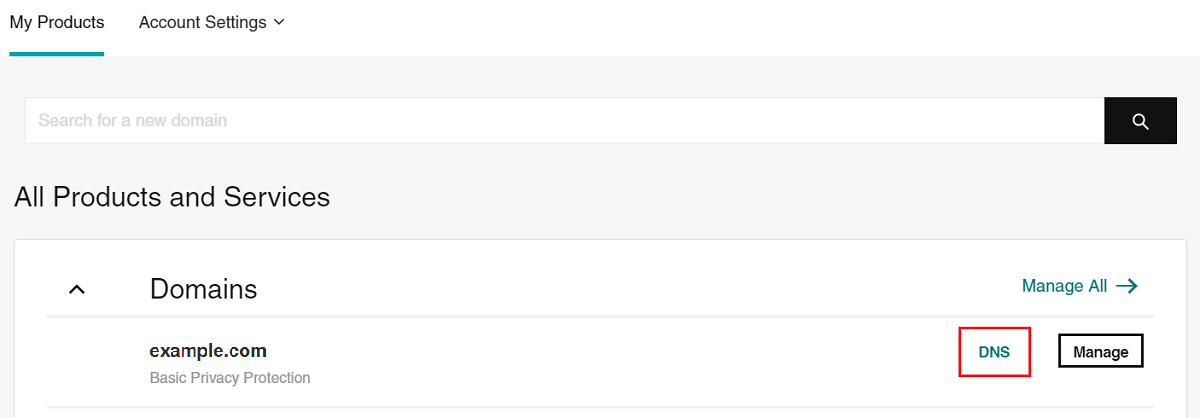
Here, click on the “DNS” settings beside the domain where you want to install the SSL.
Now, scroll down to the bottom and you will see the current nameservers which are set to default. So, we need to change them with Cloudflare nameservers.
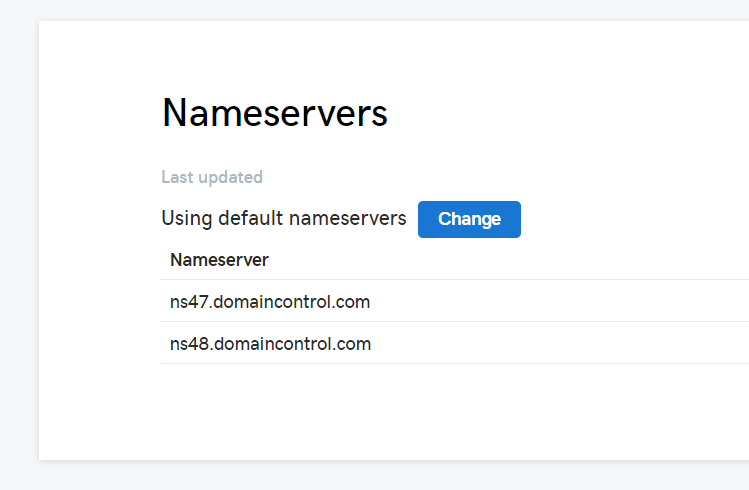
Click on “Change” and then enter the nameservers of Cloudflare.
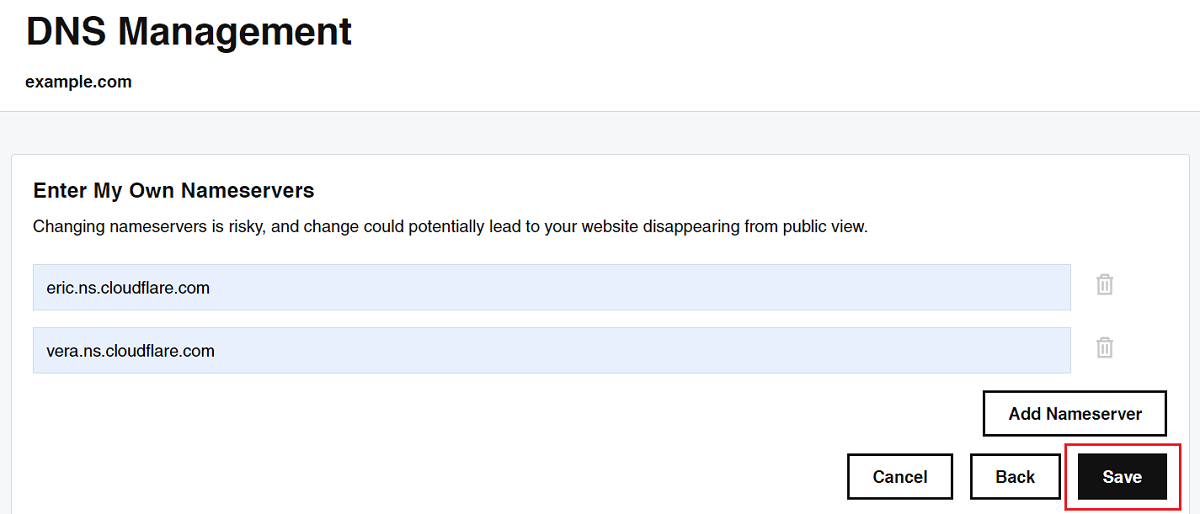
After entering the Cloudflare nameservers, click on the “Save” button.
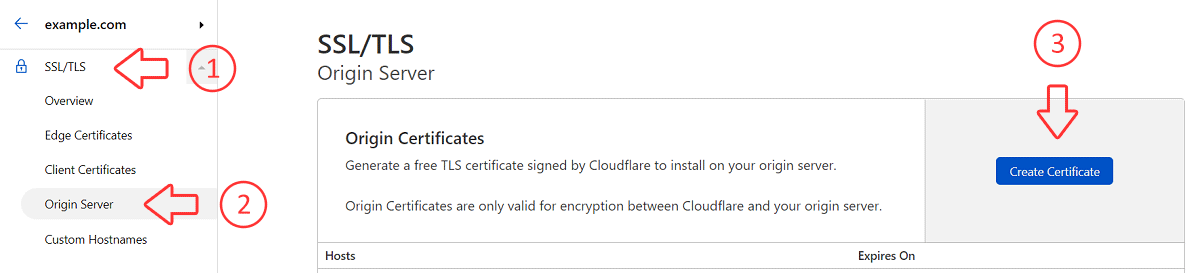
Generate Origin Certificate and Private Key on Cloudflare
Next, we need to get an “Origin Certificate” and “Private Key” from Cloudflare. Later, we will install it for the domain SSL using the cPanel.
So, go to your Cloudflare account dashboard, “SSL/TLS” > “Origin Server”, then click on “Create Certificate”.
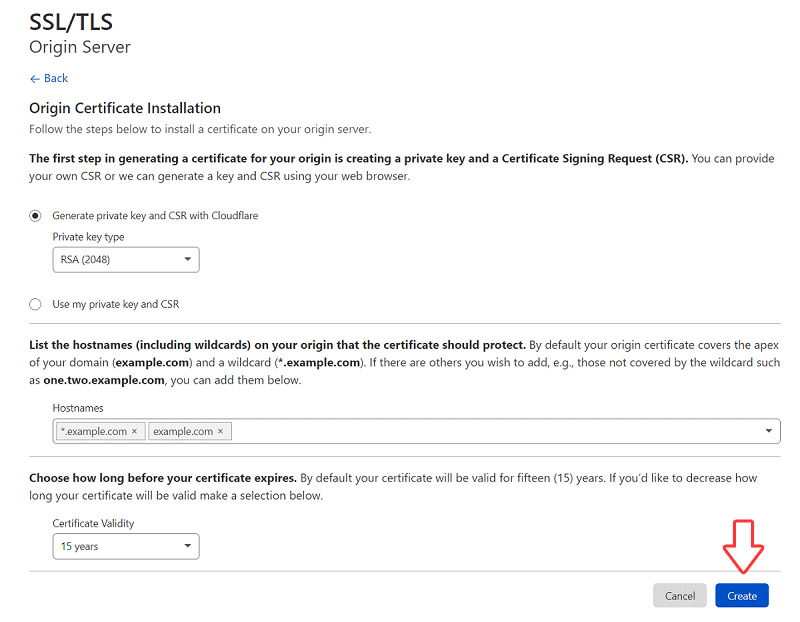
Here, select the default options and click “Create”. Now, copy both the “Origin Certificate” and “Private Key” content in a text file separately. Later, we will use these two when configuring the SSL in cPanel.
Next, you will see your newly created “Origin Certificate” in the list of origin certificates for hosts which you can download.
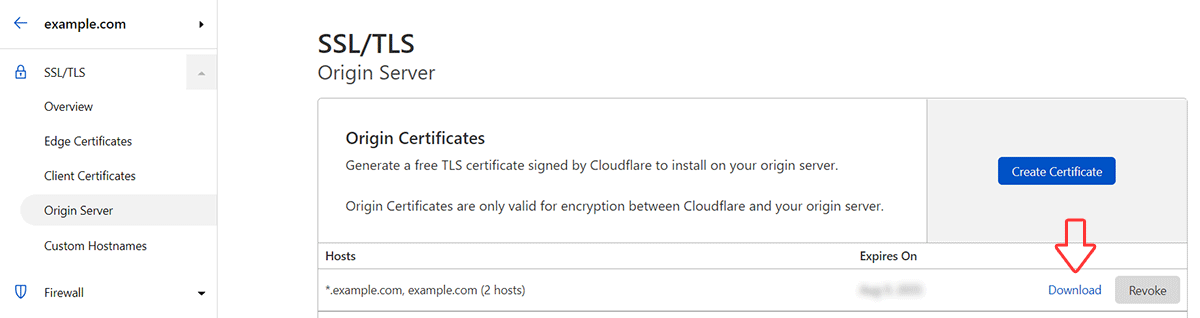
After clicking on the download, you will see “Origin Certificate”.
Make sure you have copied the “Private Key” previously in case you don’t see it after clicking on the download button. Now, we need to set these keys for our domain SSL. We will do this by using cPanel.
Uploading the Origin Certificate and Private Key on Domain Hosting using cPanel
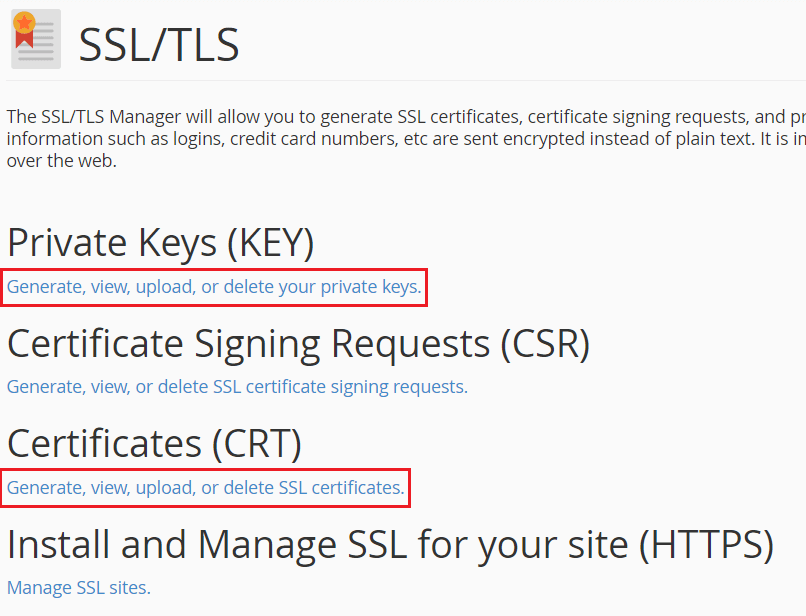
In your hosting cPanel, go to “SSL/TLS” under the “SECURITY” section.

Now, you will see “Private Keys (KEY)” and “Certificates (CRT)” where we need to enter the “Private Key” and “Origin Certificate” respectively which we get from Cloudflare.
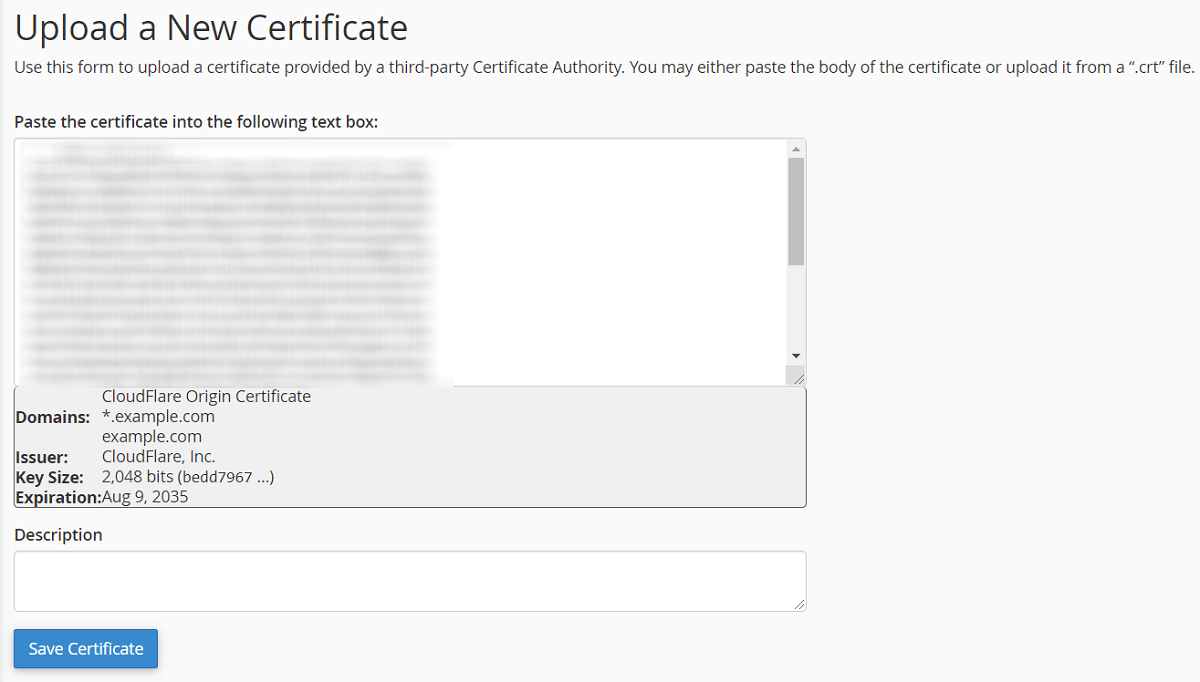
So, first, open “Certificates (CRT)” in the new tab. After scrolling down, you will see a text area with the label “Upload a New Certificate”.
Here, enter the “Origin Certificate” of Cloudflare. Also, you can leave the description field as empty and then click on the “Save” button.
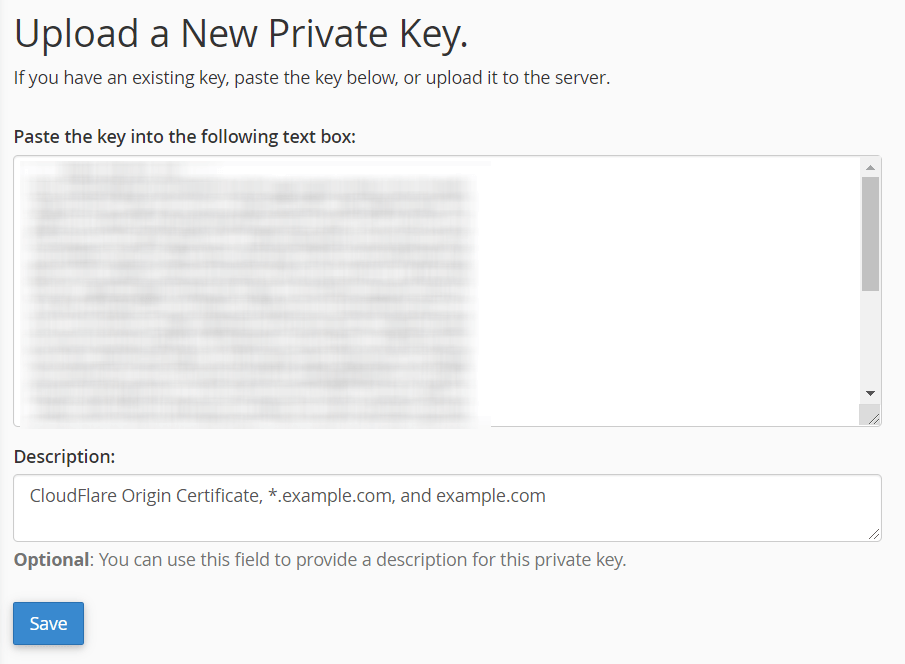
Similarly, open “Private Keys (KEY)” in the new tab and enter the “Private Key” which you get from Cloudflare.
Also, you can write in the description field: “Cloudflare Origin Certificate, *.example.com, and example.com”. Lastly, click on the “Save” button.
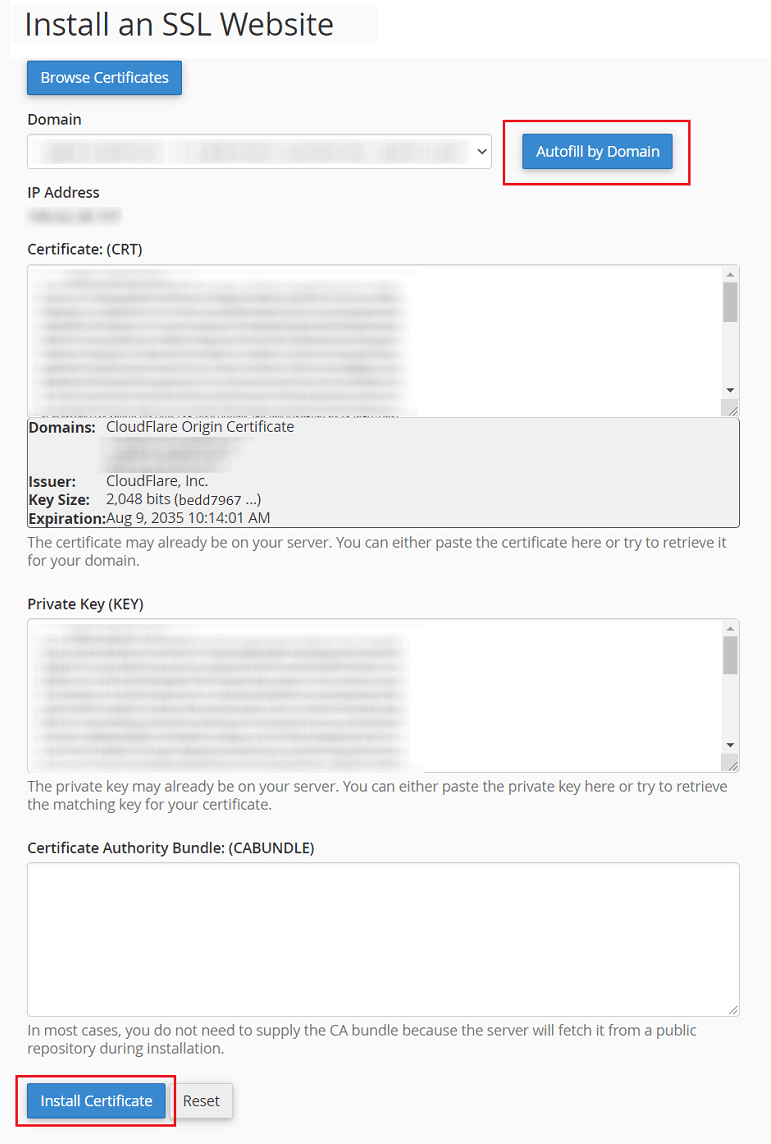
Install SSL Certificate for the Domain
Now, go back to the SSL manager and click on “Manage SSL sites”.

Here, select your domain name and click on “Autofill by Domain”. Then, click on the “Install Certificate” button.
Change SSL/TLS Encryption to Full (strict) Mode on Cloudflare
Now, we need to turn on the “Full (strict)” mode on Cloudflare.
In your Cloudflare account, “SSL/TLS” > “Overview”, set the SSL/TLS encryption mode to “Full (strict)”.

Changing the Domain Address to Make Use of HTTPS
After this, you are ready to change the domain address to make use of https.
If your site is running on WordPress, then you can change the website address from phpMyAdmin which you can find in the database section of your cPanel. And, select your database and then select the options table where you can change the address.

Here, you will need to change the “option_value” for two “option_name”: “siteurl” and “home”.
Test and Verify the SSL Installation
Finally, you can check if you have correctly installed the SSL for your domain. You can use a website like “sslshopper” to check this.
Also, you can force redirect all “http” to “https” using the .htaccess file. If you don’t know how this is done, then you can read the following guide.
If you face any issues when configuring Cloudflare, then you may reach out to us using our contact form. We will respond to you via email as soon as possible.