In this guide, you will learn how to install WordPress on CyberPanel with your domain name. Also, you will learn how to configure SSL for your domain name in CyberPanel.
CyberPanel is an open-source web hosting control panel with high performance and an easy-to-use web interface powered by an OpenLiteSpeed web server. This is a great choice for hosting a WordPress website.
First of all, make sure you have a domain name and VPS with a minimum of 20 GB space and 1 GB RAM. Here, we use Ubuntu 20.04 LTS for installing CyberPanel. Also, we use Linode as a VPS provider. You may use any other VPS provider as well.
Setup Personal Nameservers for a Domain Name
In CyberPanel, you can manage DNS records on its web control panel. To be able to manage DNS in the CyberPanel web control panel, we first need to add personal nameservers for the domain that points to the IP address of your hosting server.
First, note the IP address of your hosting server (VPS) where you need to install CyberPanel.
Then, log in to your domain registrar account for adding the personal nameservers and changing the default nameservers to these newly added personal nameservers.
Suppose you own a domain name example.com, then add these two personal nameservers: ns1.example.com and ns2.example.com for the IP address of your hosting server.
We cover examples of how to do this for domain registrars, GoDaddy and Namecheap.
For GoDaddy, you can read how to add personal nameservers in GoDaddy and how to change the default to personal nameservers in GoDaddy.
For Namecheap, you can read how to add personal nameservers in Namecheap and how to change the default to personal nameservers in Namecheap.
Similarly, you can add personal nameservers and change default nameservers to personal nameservers in any other domain registrar.
Once you have configured nameservers ns1.example.com and ns2.example.com to point to the IP address of your hosting server (VPS), then you can proceed to install CyberPanel.
Install CyberPanel on a VPS
Login to your VPS with root user access or sudo user using SSH, then upgrade the package list with the following command:
> sudo apt-get updateIf you are logged in as a root user, then use the following command to install CyberPanel:
> sh <(curl https://cyberpanel.net/install.sh || wget -O - https://cyberpanel.net/install.sh)Or, if you are logged in as a user with root privileges (sudo user) then use the following command to install CyberPanel:
> sudo su - -c "sh <(curl https://cyberpanel.net/install.sh || wget -O - https://cyberpanel.net/install.sh)"After, you will see these options:
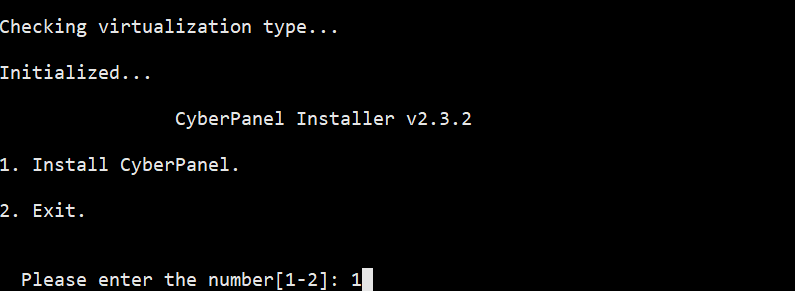
1. Install CyberPanel.
2. Exit.

Please enter the number[1-2]: 1
Here, type 1 and hit enter.
1. Install CyberPanel with OpenLiteSpeed.
2. Install Cyberpanel with LiteSpeed Enterprise.
3. Exit.

Please enter the number[1-3]: 1
Now, we choose OpenLiteSpeed (open source), so type 1 and hit enter again.
Install Full service for CyberPanel? This will include PowerDNS, Postfix and Pure-FTPd.

Full installation [Y/n]: Y
Next, type Y for “Full installation”.
Do you want to setup Remote MySQL? (This will skip installation of local MySQL)

(Default = No) Remote MySQL [y/N]: N
Since we don’t need to set up remote MySQL, so type N.
Next, simply press Enter key to continue with the latest version of CyberPanel.
Please choose to use default admin password 1234567, randomly generate one (recommended) or specify the admin password?
Choose [d]fault, [r]andom or [s]et password: [d/r/s] s
After it will ask to set the admin password for the CyberPanel control panel, so press “s” to set it. Then, enter the password with at least 8 characters.
Do you wish to install Memcached process and its PHP extension?
Please select [Y/n]: Y
Set Y for the Memcached process.
Do you wish to install Redis process and its PHP extension?
Please select [Y/n]: Y
Also, you can set Y for the Redis process.
Would you like to set up a WatchDog (beta) for Web service and Database service? YNext, press Y and enter to set up a WatchDog for web service and database service.
Now, it will take some time (30 – 40 minutes) for the CyberPanel installation to finish.
Would you like to restart your server now? [y/N]: yOnce the installation is done, it will ask you to restart your server. After restarting, you can access the CyberPanel web control panel by going to the URL: https://SERVER_IP_ADDRESS:8090/
Here, replace SERVER_IP_ADDRESS with your hosting server (VPS) IP address.
If you see an SSL warning in the browser, then simply click on “Advanced” and proceed to continue to the control panel.
In the control panel login, enter the username as “admin” and the password that you set during the installation. Then, click on “Sign In”.
Create Nameservers in CyberPanel
After signing in, you will be redirected to the CyberPanel control panel dashboard. Here, under the “DNS” menu, click on “Create Nameserver”.
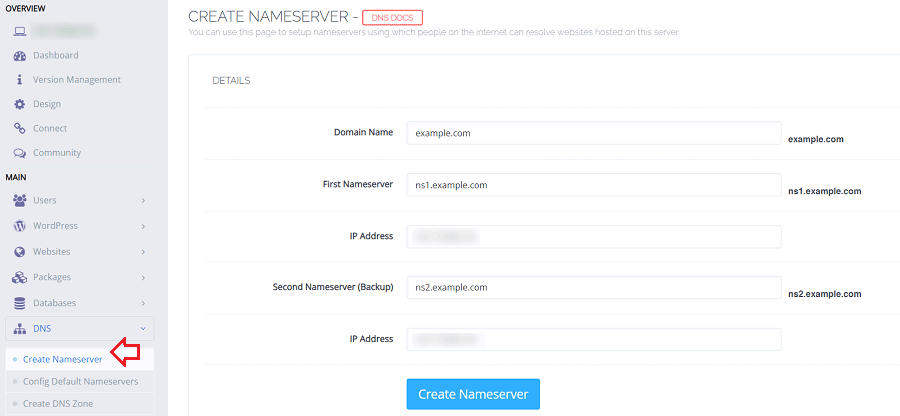
Here, provide the nameservers ns1.example.com and ns2.example.com with the IP address of this hosting server and then click on “Create Nameserver”.
This will host the nameservers and create several DNS records in CyberPanel as we have already used previously when setting up nameservers in the domain registrar account.
Install WordPress on CyberPanel
Create a Website in CyberPanel
Now, we are ready to create a website in CyberPanel. This is necessary to install the WordPress application later on this website.
To create a website, click on the “Websites” menu, then the “Create Website” button, and provide the necessary information as shown in the below screenshot.
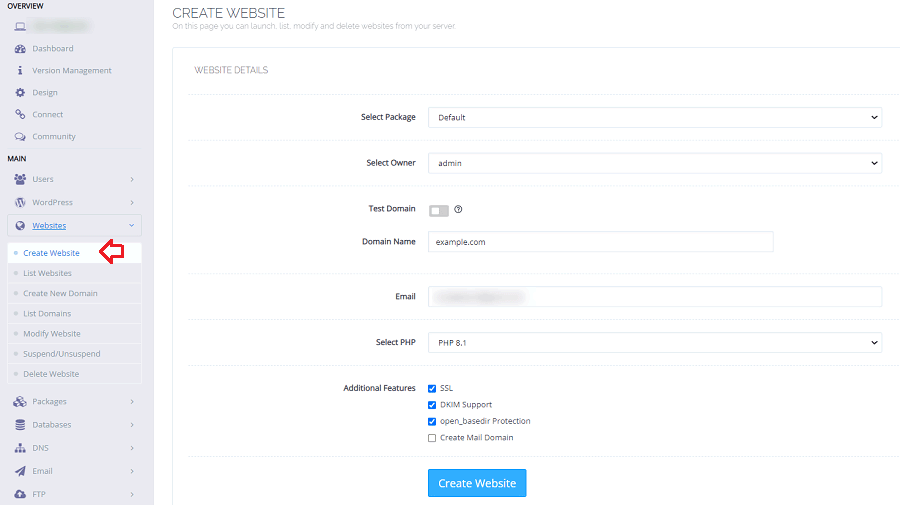
Here, you can select the “Default” package and make sure to check “SSL” and “DKIM Support” in the “Additional Features”.
The “SSL” will install Let’s Encrypt SSL on this website and the “DKIM Support” will allow you to send and receive emails on this domain name.
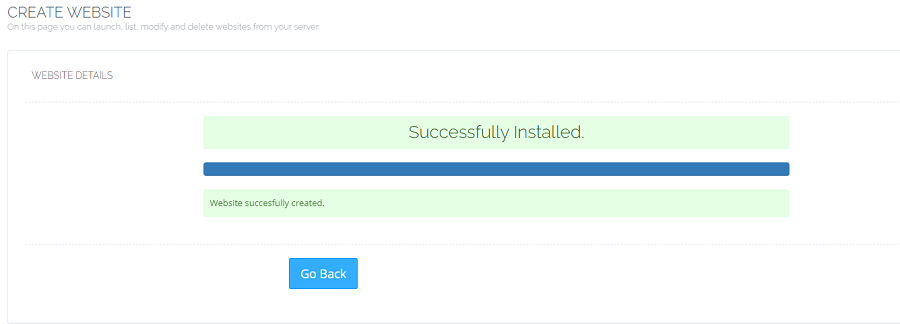
Finally, click on the “Create Website” button to create a website.
You may also want to modify the “Default” package later. The “Default” package comes with a bandwidth of 1000 MB and also a disk space of 1000 MB.
To increase or remove these space limitations, go to the “Packages” menu, then click on the “Modify Package”, and select “Default” package to modify it.
Install WordPress on a Website in CyberPanel
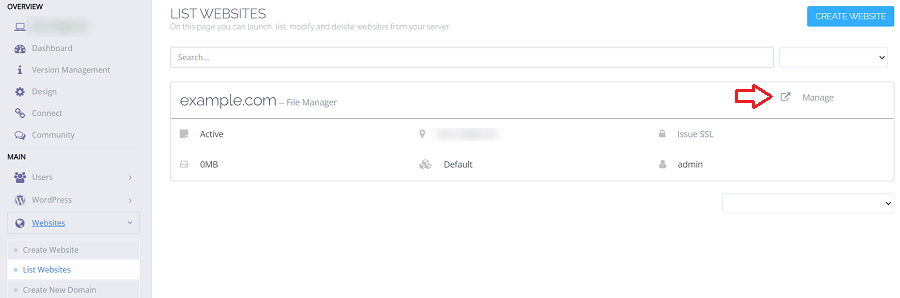
The next step is to install WordPress on this newly created website. To do so, click on the “Websites” menu, then “List Websites”.
Here, click on the “Manage” button to see more options for this website.
Then, you can scroll down to see the “WP + LSCache” option in the “Application Installer” section. You can click on it to install WordPress on this website.

This will ask to provide details for this WordPress installation.
After providing the details for your WordPress website, you can click on the “Install Now” button.
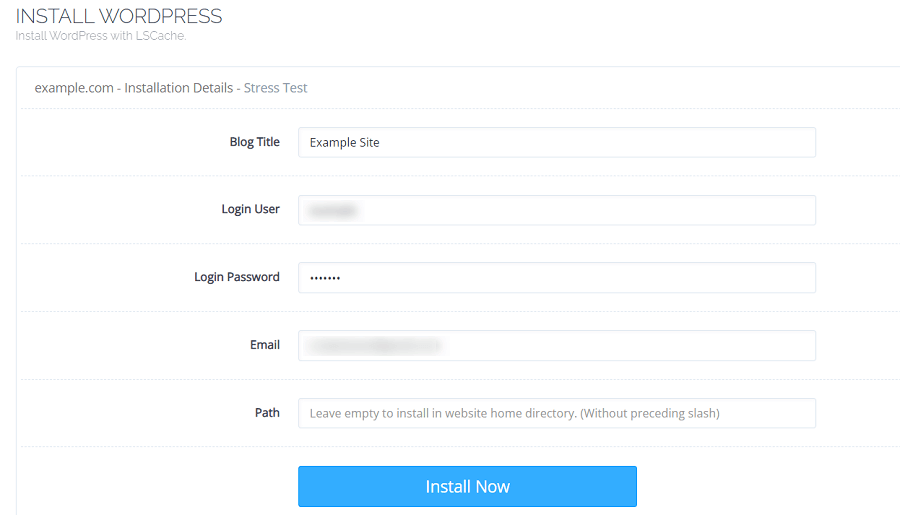
This will take about 30 – 40 seconds to install a WordPress application as well as the LS Cache plugin on this website which is crucial to improve the performance of a WordPress site running on LiteSpeed or OpenLiteSpeed web server.
Once done, you can go to your domain “example.com” and log in to your WordPress using the URL “example.com/wp-admin”.
The next step is to configure SSL settings and change the WordPress site URL to make use of HTTPS instead of HTTP.
Configure Domain SSL in CyberPanel
If you have already checked “SSL” in “Additional Features” previously when creating a website, then you can skip the below step of issuing SSL to a website.

You can issue SSL to any website by going to the “SSL” menu, then clicking on “Manage SSL”. Here, select the website and then click on the “Issue SSL” button. You don’t need to do this if you have previously checked “SSL” when creating a website.
Also, you can verify if you have an SSL correctly installed for your website. You can use a website like “sslshopper” to check this for your domain.
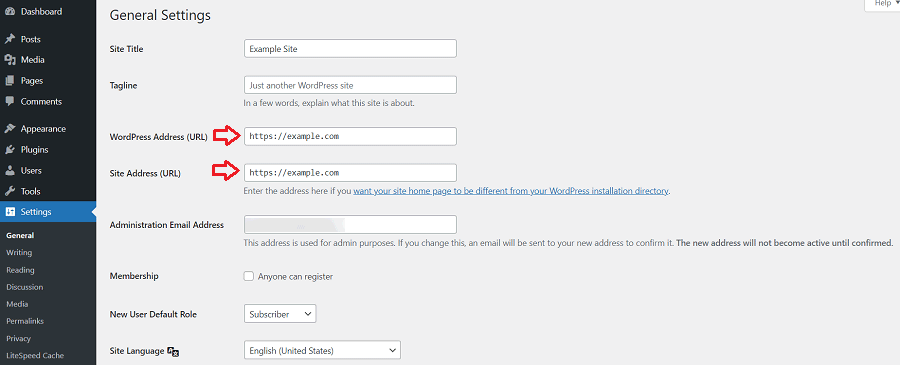
Now, we can change WordPress Site URL so it uses HTTPS. In your WordPress admin, go to “Settings” > “General”. Then, change the URLs so it uses SSL, that is “https://example.com” instead of just “http://example.com“.
Force Redirect all Requests from HTTP to HTTPS
Finally, you can force redirect all URLs to make use of HTTPS by adding these rewrite rules using the CyberPanel control panel.
Once again, go to “Websites” > “List Websites”, then click on the “Manage” button and scroll down to see “Rewrite Rules” in the “Configuration” section.
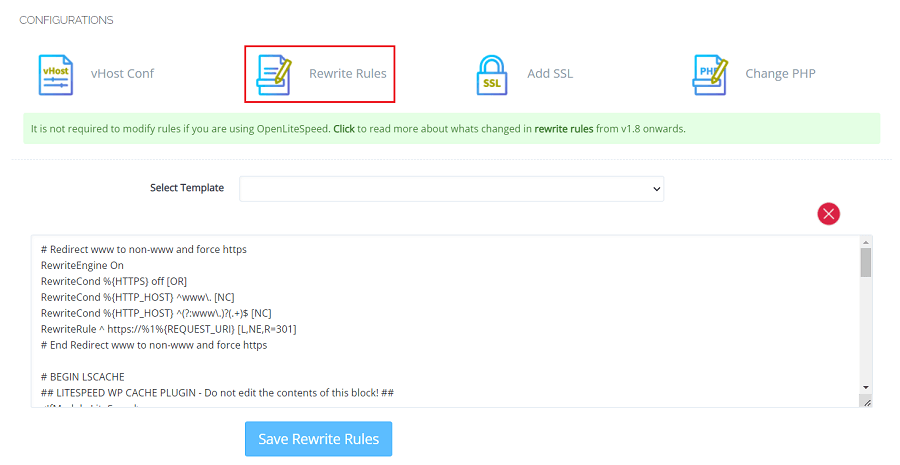
Here, add the following rewrite rules at the top and then click on “Save Rewrite Rules”.
# Redirect www to non-www and force https
RewriteEngine On
RewriteCond %{HTTPS} off [OR]
RewriteCond %{HTTP_HOST} ^www\. [NC]
RewriteCond %{HTTP_HOST} ^(?:www\.)?(.+)$ [NC]
RewriteRule ^ https://%1%{REQUEST_URI} [L,NE,R=301]
# End Redirect www to non-www and force https
As a bonus, you may check these free blogging themes for your WordPress site. Also, you may check a dark theme and a dark mode plugin for WordPress news and blogging site.
If you face any issues when setting up CyberPanel and WordPress, then you can reach out to us using our contact form.